If you have Avaya IP Office, you should be able to setup IP extensions for Voicent software, Please check the user manual for your Avaya IP office. Normally you can find sections for configuring extensions for SIP softphones like X-lite. You can also google the term Avaya IP office SIP extension for more info. Once you have these extensions configured, you need to obtain the SIP credentials for these extensions. The following is a setup guide from Avaya support (Avaya IP Office SIP Extension), in which it explains how to gather your SIP credentials.
Avaya SES depends on the Avaya switch or PBX system you have, it may or may not support IP extensions (SIP) directly. However, Avaya offers a product called "SIP Enablement Service", aka, SES, which enables its products to use any SIP based hardware and software, including Voicent software.
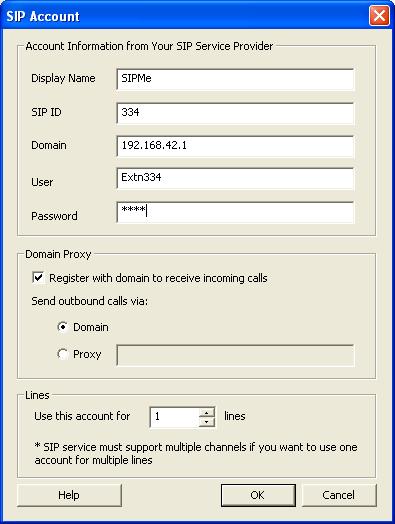
Open Voicent's Software, select Setup > Options > SIP tab, and click the Add button. Enter your extension information as shown below. The settings should be the same as for X-Lite, shown in page 20 of the above mentioned Avaya document.
Please remember to replace the setting values with your own extension info. The domain name should be the IP address of your Avaya PBX system.

If you want to setup multiple lines, you need to repeat the steps to create additional extensions.