Share This Post:
How To Install Voicent Products
To install Voicent products you must first download the installer from our Download page. Once you’ve downloaded this file, you can run it by double clicking it. This program is our Installation Wizard and will ask you basic information like which products you want to download, and where you wish to download them.
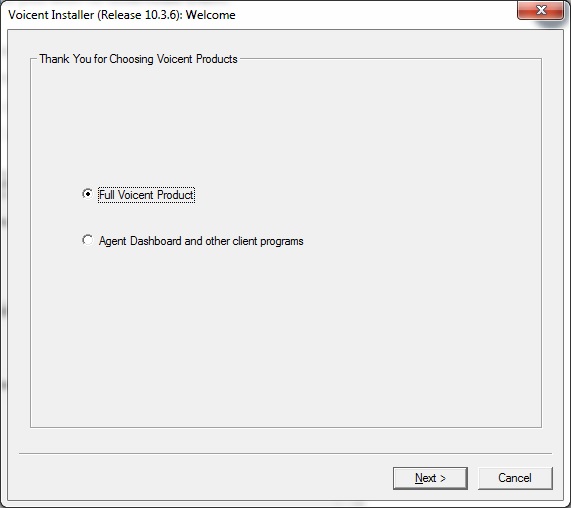
Below is a picture of what the Installation Wizard start menu looks like. If you’re installing the software as a manager/owner, you’ll want to select Main Programs. If you’re an agent who will be connecting to the main installation of the software remotely, you’ll want to select “Agent Dashboard Only”.

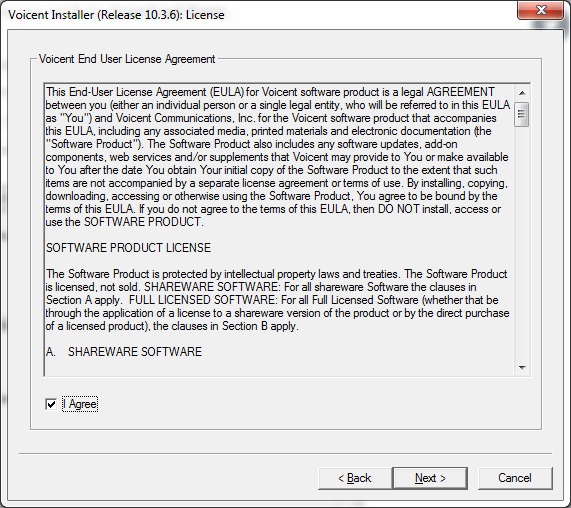
The next menu will look like the one below. Click on the box next to “I Agree” to agree to the End User License Agreement and then click “Next” to move forward.

After agreeing to the End User Agreement you need to select the installation folder, and wait for it install the software. Now you can press “Finish” to end the installation wizard and begin the product setup.
Still having trouble? Take a look at our installation FAQs here.
The next step is going to be setting up your Voicent software. For information on this step of the process, click here. After installing your Voicent software, you’ll likely want to check out some of our tutorials.
3 Responses to How To Install Voicent Products
Share This Post:

Where should the software be installed on a network? I have a Windows 2008r2 server with 10 Windows 10 clients. I run Snappy Fax server on my server. On a client machine I run 3Cx PBX and connect to 6 FXO ports on a grand stream gateway 6 pots lines. Thanks
testing this software.. downloaded and installed on fresh Win10 setup (vm), downloaded installed latest Java.
software keeps saying java not installed, but it is. wont run.
meh.
Yanni,
You need Java 8 for the latest release (10). Release 9 requires Java 7 Update 55.