Share This Post:
Configure Nextiva Office VoIP Service with Voicent
If you have Nextiva’s Phone Service with Professional Features, you can configure Voicent software to use the service.
Step 1: Collect Nextiva SIP Information
First, login to your Nextiva account and configure extensions for your Nextiva service here. If you have an 8-user Nextiva office plan, you can configure 8 extensions. For each extension, you can get obtain SIP credentials, which is information like your username, password, etc, for the extension.
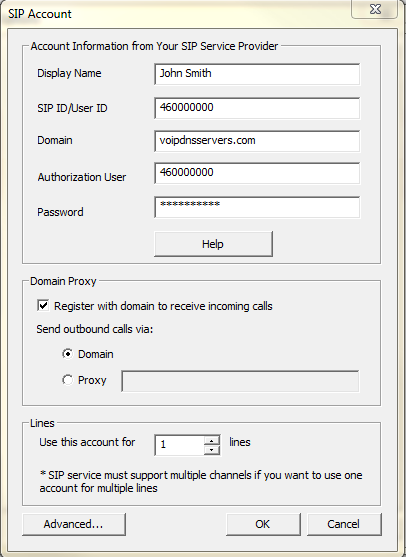
In the Technical Phone Information of your Nextiva account, you can find your SIP credentials. The username/SIP ID is called the “Authentication name” and the password is the “Authentication key“. The SIP domain is “voipdnsservers.com”.
Step 2: Setup Voicent with Nextiva
Open the “Voicent App”, the select “Setup” and click “Options”, proceed to select the “SIP” tab and enter your account information like the image below. Please remember to replace the 460000000 with your actual authentication name.
Other SIP settings you may need to check: Stun Server: try some of the public stun servers such as stun.xten.com. Codec: PCMU
Click on OK to complete the SIP account setup.
Sometimes, you may need to append 5062 to the domain name, like voipdnsservers.com:5062
Share This Post:

